Making robots and tinkering with electronic toys and appliances has never been so easy since the invention of the Arduino board! And fun too!
The Arduino is an Italian brand of “microcontrollers” invented in 2005 which has spawned a handful of competitive brands of Arduino-like boards and all kinds of add on products and countless thousands of DIY (do it yourself) robots and computerized contraptions!
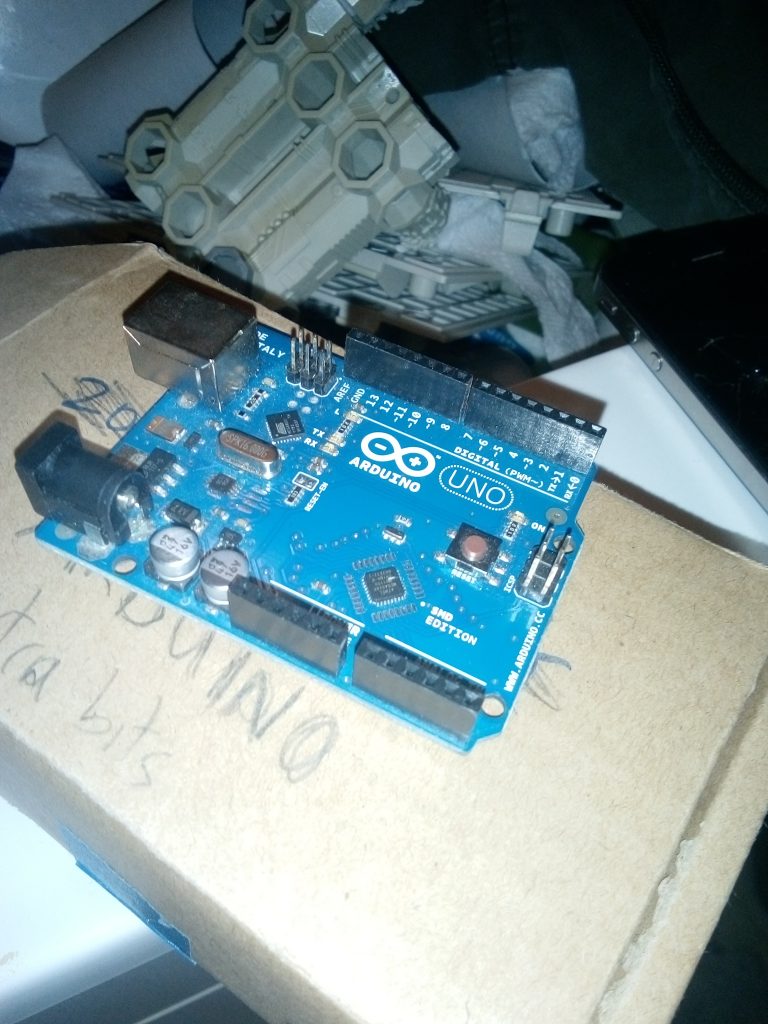
We all know what a regular PC computer looks like. An Arduino is NOT a full computer but is a $30 computer circuit board about 6 inches long and is a member of the computer parts world called “microcontrollers”. It is amazing because it is both a hardware and a software solution that lets you plug in electronic components like sensors and motors so you can easily add pre-written software to it and build robotic things which can have moving arms, flashing eyes and even artificial intelligence!
There were similar attempts to make an easy microcontroller for people back in 1992 with one called the Parallax BASIC Stamp but this never really caught on like the Arduino.
The Arduino hardware and software combination are part of what is called the “Open Source” movement which means that everyone in the world is encouraged to share their free software and make better things with the tools everyday. This is an example of what is called “physical computing” because the Arduino hardware board is interacting with objects in the physical world.
The Raspberry Pi is a similar looking inexpensive circuit board but it is a more powerful board that “IS” actually a full pc computer however you can’t add electronic parts to it as easily as the Arduino board solution.
Later when you get really fancy, you may learn how to program the Arduino with the C++ language or the Raspberry Pi with the Python language. When you are almost at superstar levels you can get a board like the Nvidia company’s “Jetson Nano” for about $400 and learn how to program Artificial intelligence applications! Oh Wow….mercy me.
Now back to the Arduino and how you would use it.
You can easily plug sensors and servo motors and more into the Arduino and then into the necessary separate small 6 inch long thin circuit board(breadboard) along with a battery.
Then if your Arduino has already been set up and plugged into your computer you could use the Arduino editing software to either copy a pre-written program into your Arduino board or write a new program called a “Sketch”. You would then press the compile key and if it worked, you might see your robot arms start moving or its eyes start blinking!
The important thing to know at this point is that you write and edit the sketch or program on your PC computer and then it is compiled and sent to the Arduino board where it stays and runs. So now you can disconnect your Arduino from your computer and the Arduino will have the program inside of it and will be able to continue to process whatever actions on the sensors and motors that you set up in the program.
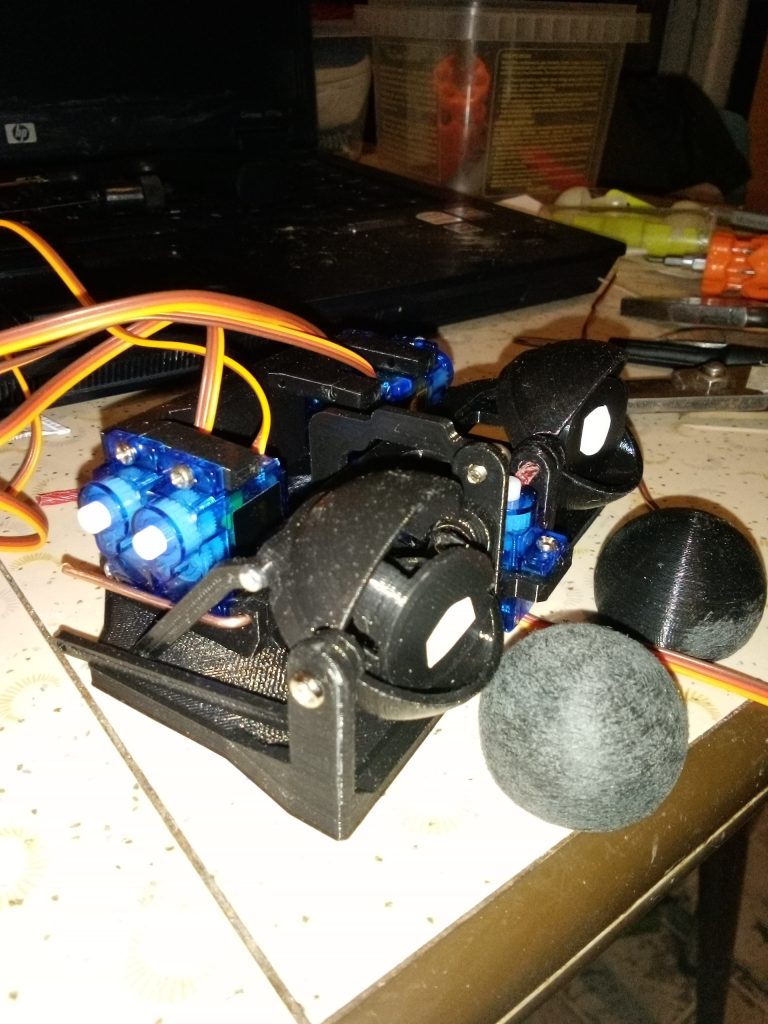
The beauty of using fancier $6 servo motors instead of the old fashioned $4 DC motors from an RC car toy is that servos have 3 pins and the one important pin called the “PWM” (pulse width moulation) allows you to move the spinning part of the servo (the horn) a little to the left or right or a lot to the left or right with your software program which could be controlled by the sensors in your robot device. MAGIC!
To make it easier to control 6 or more servos you might add another circuit board to the top of your Arduino, like for example the Adafruit 16 channel board.
Lets talk a little bit more about the Arduino board itself.
The sockets on the board allow it to plug into various electronic things…it has 28 female pin headers that can be connected to circuits.
These are broken off into 3 groups for power, analog input and digital in and output.
20 are called the io pins and are used to connect the motors, sensors etc
The 6 analog pins are labelled A0 to A5 and take different voltage amounts and are where sensor applications can be attached.
The 14 digital io pins have just two voltage levels of 5 or 0 volts.
The USB is a port there to power up your board from your computer and to send the Arduino program from your computer into the arduion board.
The arduino can only take 5 volts of power so it has a built in voltage regulator that makes sure that if more power is coming in from a source that it will be brought down to the correct level. Of course too much power could burn out the voltage regulator.
Most electronics that you will use on an arduino will require either a 5 volt or a 3.3 power supply. If you have huge motors or servos they can be powered separately away from the arduino for power.