Lets discuss the 2 foot and 4 foot variety of the Meccanoids and how to make them work as suggested in the manual and what else you can do with the parts or the brain brick.
In 2015 Spinmaster brought out the 2 foot humanoid robot toy named Meccnoid G15 and a bit later the 4 foot version called Meccanoid GKS (kids size) with a few more servos on the neck and shoulders and features.
Now lets talk about getting the robot to do something and how to program it using the technology called LIM and the downloadable APP and with **.
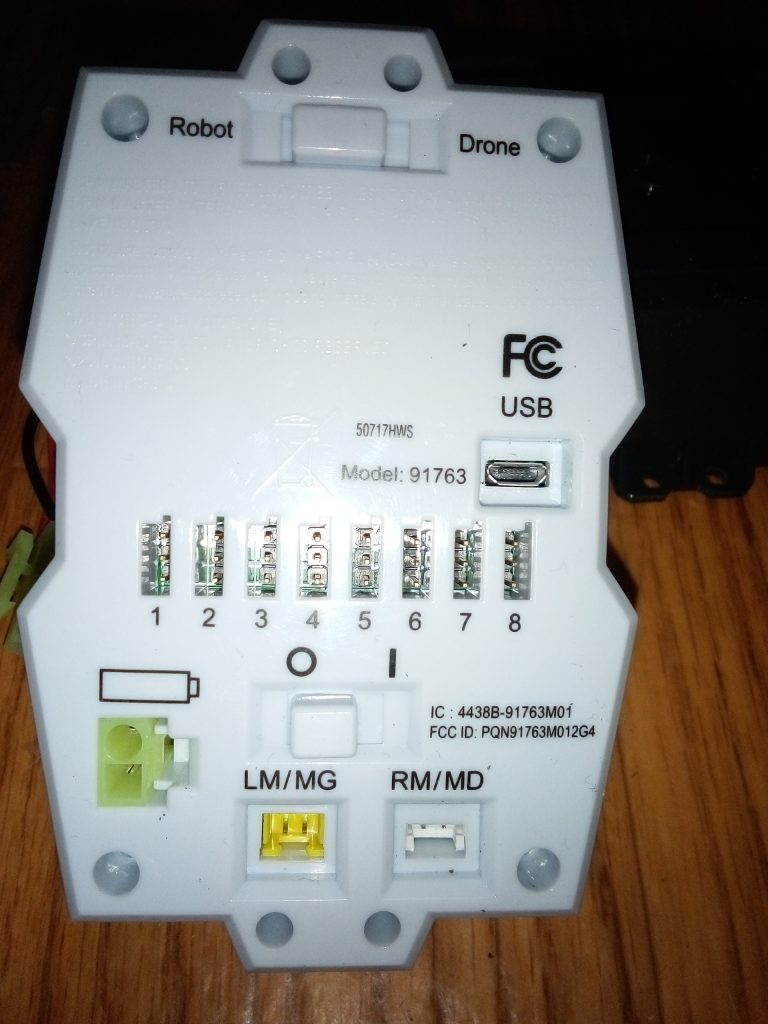
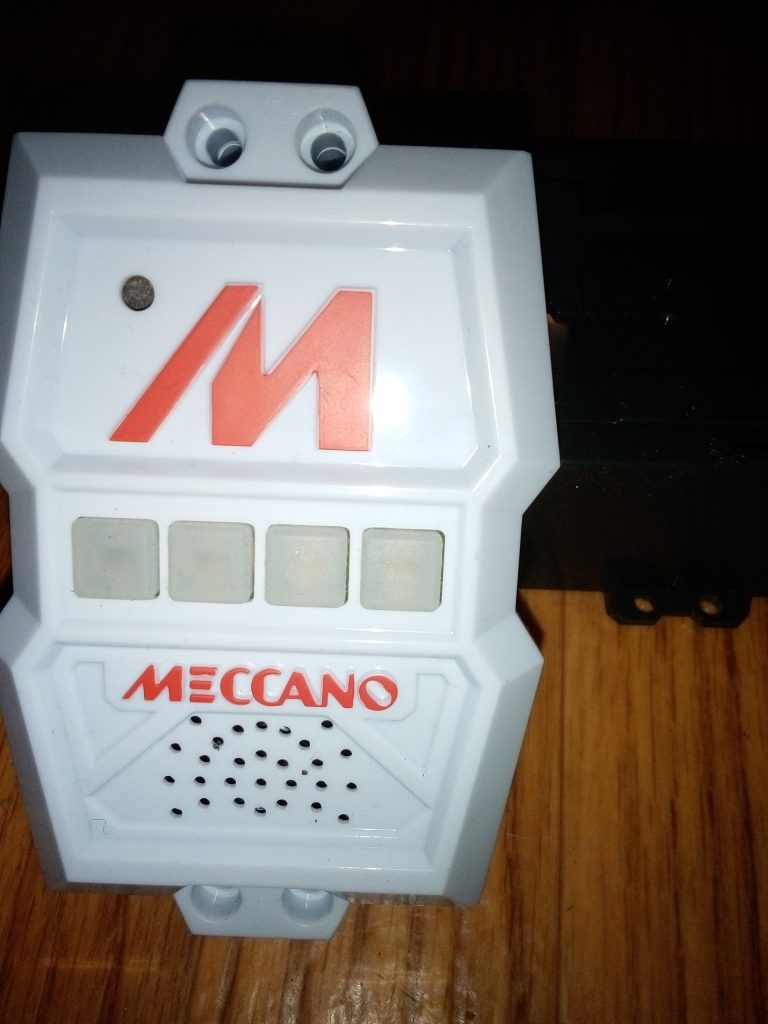
First of all the brains of the robot is the rectangular box which allows you to plug your servos and other devices into. It is very much like the rectangular box or brain that comes with the Lego Mindstorms older NXT or newer EV3 robot kit.
Lets basically say a few things about what the robot can do.
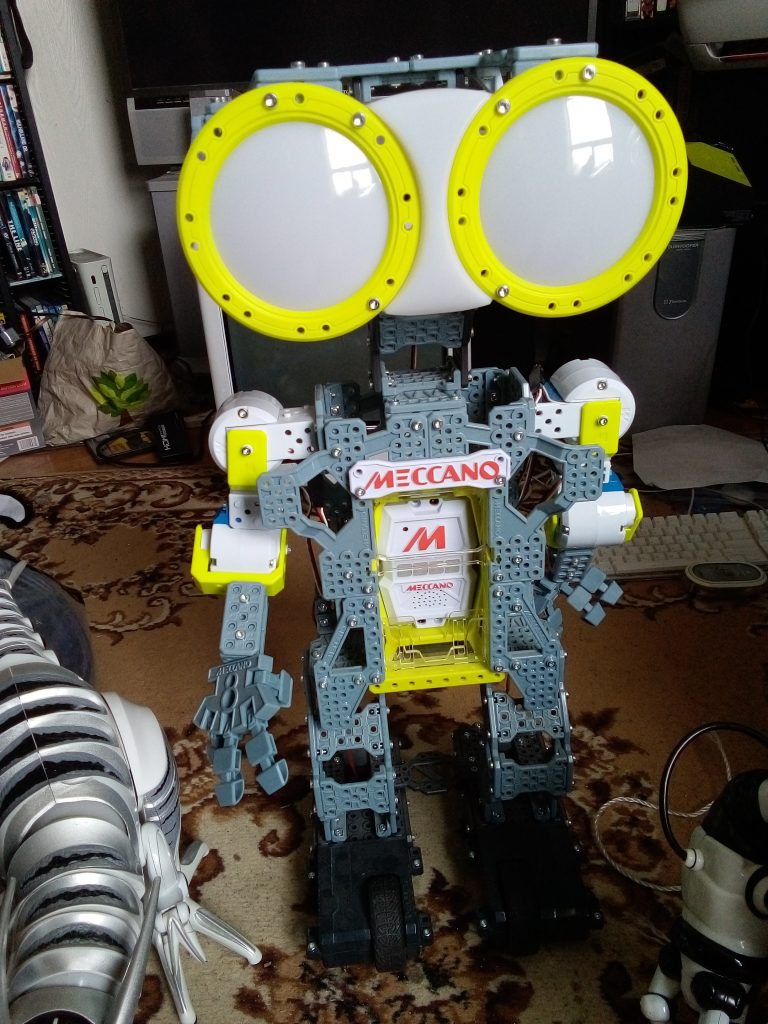
To start with it looks like a little person being only 2 feet tall and although the legs are fixed to a movable wheeled base, its arms can go up and down and it can respond to commands and the big eye device changes color based on its mode.
Now you could easily put clothes on this robot and make it look more like a person or take off the arms body head and the base battery and the brain and reassemble it into a different type of robot.
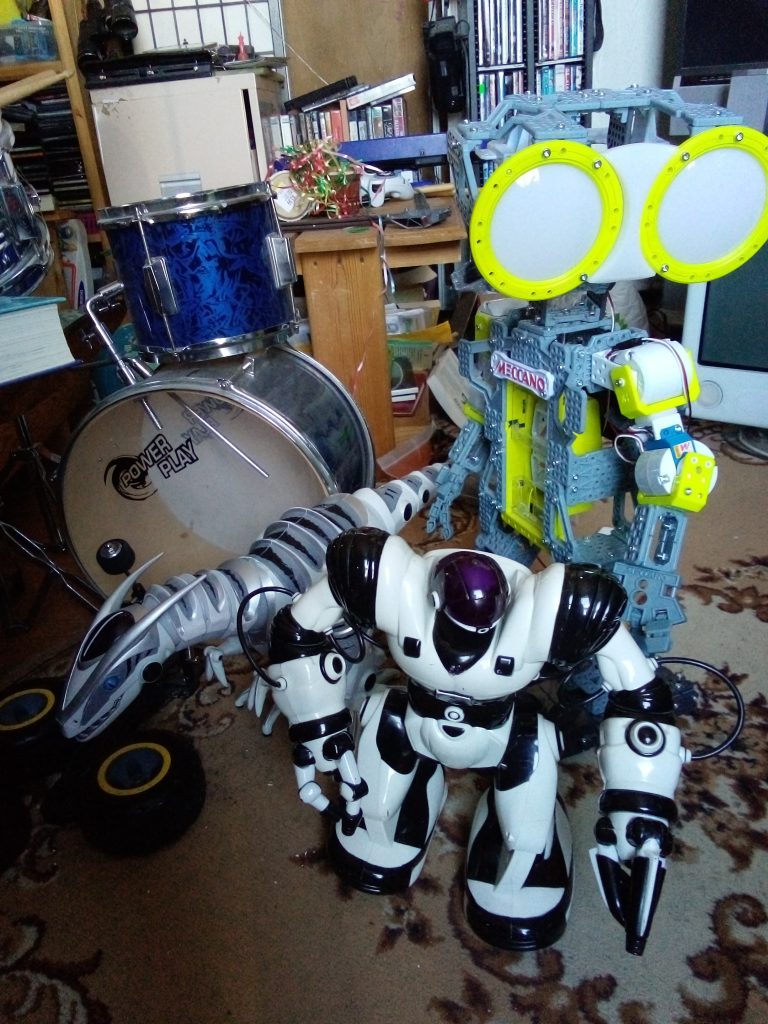
Here you can see where I took gutted a Robosapien V2 and cut and screwed in some meccano arms and servos and installed the brain into a hole that I cut into the now hollowed out robosapien.
The robosapien can now move its arms again (in its original form it could move its arms but due to the faulty wiring many of them have when they age this stops working).
But you could technically turn any type of similar size toy or doll into a type of robot quickly by installing the parts from a Meccanoid into it.
The original meccnoid obviously was trying to avoid any “uncanny valley” problem by making it look like a 1970s robot with metal looking clunky frame and big round digital looking eyes and a robot like voice and hands
The newer KS15 has a few more servos so the head can move and there is another set in the arms.
Now lets briefly talk about how you interact with it before you even try to program it.
You turn it on with the switch at the back on the brain. It has two main modes one for robot use which lets it respond to commands and move around and the drone mode which is used if you take it apart and make it into some other type of robot or toy.
So there are 4 buttons which we will cover but once you turn it on it will do the self check that almost every robot will do.
If an arm is missing or the servo is loose it will say that there is a problem.
If it all checks out ok then you can give it a command or program it by pressing the red button on the brain or by using your APP.
You can say about 14 commands like “motion control” or record LIM” or “list commands” or
Tell me a joke
what time is it
settings
high five
shake hands
walk with me
go to sleep
help
list commands
main menu
Now the most impressive one is to say “motion control” and then you can issue about 12 commands like forward, backward, left turn right turn, dance, kung fu
Now lets talk about programming the robot.
The LIM technique is the best way to start.
You can either be in the command mode and simply say “record LIM” or you can press the red button on the brain that says record lim or you can choose from previously recorded LIMs by pressing the blue button for LIM library.
Now using the LIM is very much like how you control some industrial robots using what they call a teaching pendant.
In an industrial robot if you want it to do some welding you basically move the arm around in the same sequence that you want it to move when it is doing the welding.
This is what we do with the LIM programming feature.
After you issue the command record LIM you then move its arms around and talk for up to 3 minutes and this gets recorded into the library and can be played back at any time.
Technically if you wanted to make a fake Elvis presley robot you could play some Elvis talking and songs into this LIM feature and move the robots arms in the style of strumming a guitar and then cover the robot in an elvis outfit with a new head or the Wowwee talking and eye moving head.
Ideally you could dismantle the mecannoid and use longer actual elvis sized arms and possibly use the same low power servos to move the arms with the extra weight of the Elvis clothing. You probably would need to use more powerful servos though. Again the legs to not move here at all.
So you may consider instead using parts of a Gemmy dancing santa to at least acheive a moving or gyrating waist area.
Now the next way to program the Mecannoid is through the downloadable app.
Now this APP is a beautifual graphical representation of the mecanno and it allows you to move your finger on the phone screen and move the robots arms around however you want to and the robot will instantly do it since they would be nearby and connected through bluetooth technology.
WIth the app there are two ways of moving or programming the robot.
The first way is to move the robots arms on the app or use the sliders to create an animation in what they call the ragdoll method, or you can put the phone in front of the meccanoids brain and do a motion capture of whatever moves you do.
The camera on your phone will watch you and mimic whatever you do with your arms and allow you to save this sequence and play it back later.
Now the last interesting way to program the Meccano involves Arduino code since the Meccano website has a link to download some Arduino sketch progrm that will work with your robot.
http://www.nzmeccano.com/Documents.php?show=118
Here is a link on Github to some basic Arduino code for the Meccanoid GK 15 by Leroy Miller on Youtube. https://github.com/automation-technology-club/Meccano-Smart-Servo


